Recently, I completed phase 1 of converting my old bike into an electric bike. What follows is all of the info that I could think to share about this process. I’ve been getting a lot of questions about it and documenting it all seems like a good idea.


Why would you do such a thing???
Good question. Back at the beginning of 2021, we had a beautiful spring and I thought to myself “This is it, its time to get off my butt and go bike riding!” I was already actively working out etc, and figured I was in decent enough shape to get back out there. Well, little did I know how my body would react to all of the hills, etc.. we have around here. After a couple of tries where my heart rate went up to 180-ish, and my smart watch pretty much asked me if I was having a heart attack, I gave up on it and put it all back in the garage.. Defeated 🙁
But, wait a minute… this isn’t me!!! I’m not the type to just give up. Dammit, it was time to science the heck outta this! I had already been looking into e-bikes and now I had more of a reason to focus on it. From this moment on, I spent the rest of the year digging into the tech and dreaming about how I wanted to do this. Finally, after months of paralysis by analysis, and other priorities getting in the way. It was time.
Also, I regularly go out for long walks in the city for cardio, etc.. and I find myself wanting to go further/longer. I think it will be a good thing to mix up the monotony of just walking every day.
You know you can just buy one, right?
Yeah, that was my first thought. I did look around and I learned a LOT about e-bikes. For example, did you know that there are actually different classes of e-bike on the market? (Links below about these classes). Also, did you know that the type you have determines both when/where you can legally ride it, how many more accessories you will likely need for it, and so much more.
Different E-bike Classes (Wired Mag) (Juicedbikes) (Aventon)
Bikes I looked at:
- Giant (link)
- rode very nice, multiple power modes
- relatively underpowered for what I wanted
- reasonably priced, but still too expensive for me (for now)
- Trek (link)
- see Giant above. Samey samey
- radpowerbikes (link)
- relatively cheap(er)
- Great… if by great you mean EXTREMELY HEAVY, cheap welds, cheap components
- So many bad reviews and breakage reports
- Yamaha (link)
- Great bikes, great components, horrifyingly expensive!!!!
- You shouldn’t need a loan to buy a bicycle.
- Ridiculous looking small wheeled, low cross bar bikes (Many of them)
- I really just didn’t like how these looked or rode.
- Why can’t any of them just look like bikes?!?!?
Ultimately, after looking around and test riding a few factory-built e-bikes, I was unable to find what I was looking for both price-wise and functionality wise. I decided that it was time to build.
Okay, so, how ya gonna do this?
Well, let’s start with the basics. After all of this research, I decided that I wanted to stay within reasonable limits, but still get the maximum performance out of my build. 250w just wasn’t gonna cut it for me! What I’ve read is that most states set a wattage limit of 500w to determine between an electric motorcycle and a bicycle, but its only arbitrarily enforced. Still, better safe than sorry. I figure that straddling the line between a class 1 and a class 2 is the sweet spot here. I wanted enough battery to avoid range anxiety, yet keep my battery costs down and allow me to buy the batteries piecemeal. I wanted to keep all of this simple enough, yet allow for future customization and expansion as my knowledge and experience grows with all of this. Finally, I wanted to make all of this reasonably waterproof as, well, rain happens! I don’t expect it to be capable of, say, driving into a lake and still working. LOL, its not a submarine! Just, relatively safe in mild rain while I am ducking for cover.
There are two main kit suppliers on the market and readily-available here in the USA: Bafang and L-faster. Bafang is the more expensive solution, but they use really good components! Still, 1200+ just wasn’t palletable to me. L-faster uses cheaper components and is harder to install correctly, but at at sub-$1000 price point, it was more what I was looking for. After all, my bike is from 2009-2010, and it isn’t getting any younger. It is a hardtail, has older-style v-brakes, skinny hybrid tires… I could go on. Basically, it was not designed for such a thing. But, it is what I had and I was gonna use it. My thought behind all of this was it’ll last a year or so and then, maybe I’ll drop a big chunk of money on a factory-built system if I feel like I need more.
Here is my initial component and price list for the prototype phase:
- 2010 Marin Larkspur 15.5 hybrid bike
- L-Faster 36v 450w side-drive basic kit (link)
- Hailong 8ah 36v Li-ion battery pack (Link)
- Rear panier bags for storage (Link)
- Bike lock set (link)
- an old front storage pouch that I had on hand
- an old rear rack that I had on hand
- Various wire ties, etc…
- an old AA-powered headlight and tail-light kit that I had on hand.
- Total = around $500-ish.
The build:
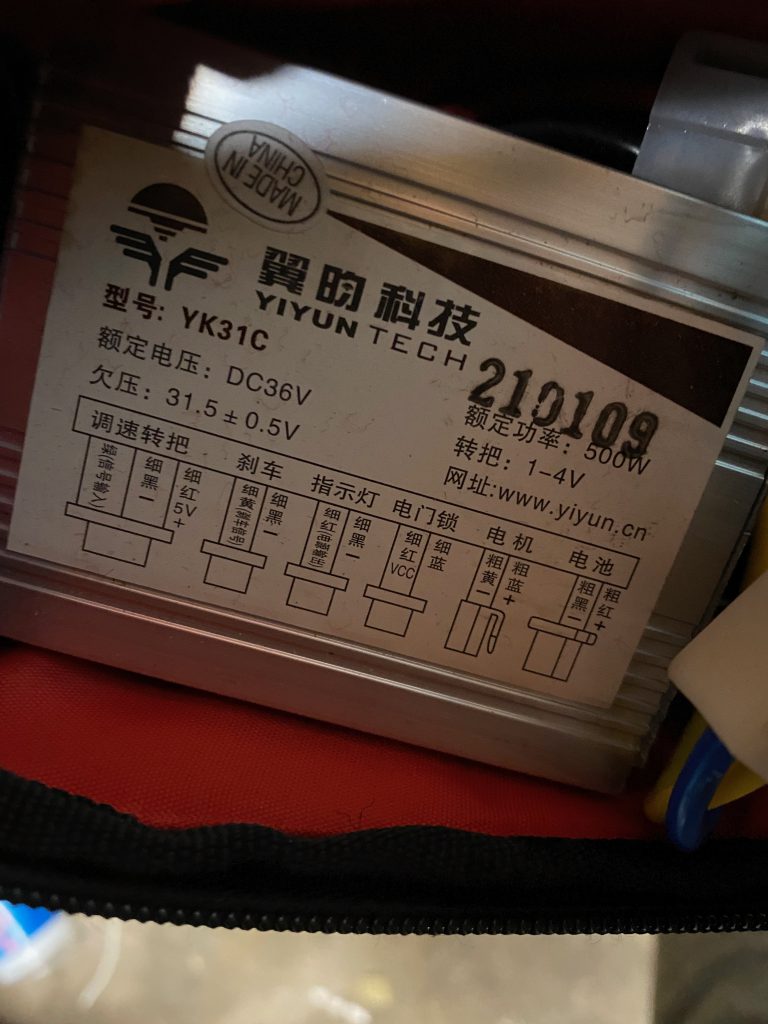
The old front-storage pouch would have to serve for a controller box…. for now. I cut a small hole in it, and put the controller in there. Initially, I was worried about heat and cooling for the controller, but since this prototyping took place in early spring, I figured it was alright for now. That said, there is no way that I would simply throw this controller box into a closed pouch and try to ride like this during summer!
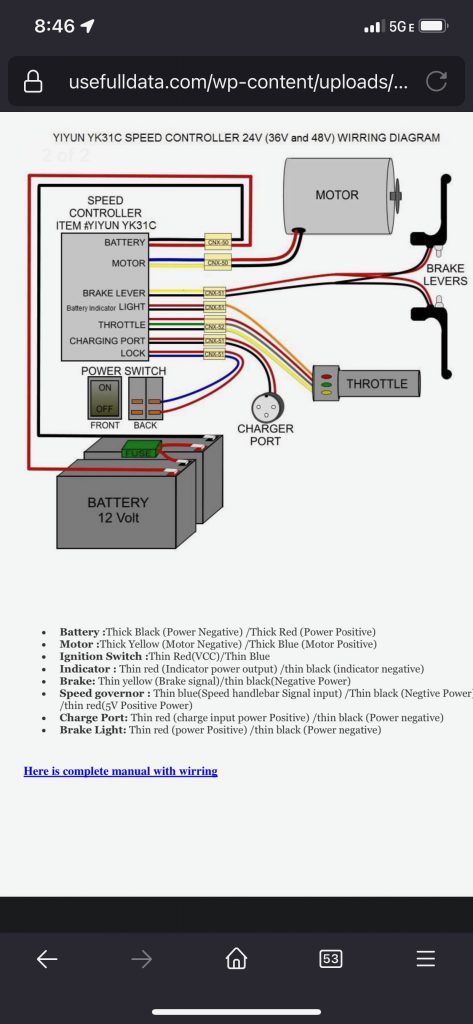
The wiring guide that came with the L-faster kit was not great. But, it was functional for the basics. It took some searching, but I found the wiring guide in English on a different website. (posted below). If someone is just installing the kit, its probably not needed…. but, putting it here in case it helps someone else. Of note, I bought the basic kit without brake controls. As I will cover in part 2 of this guide, I don’t really recommend city riding without a functional brake light!!!!


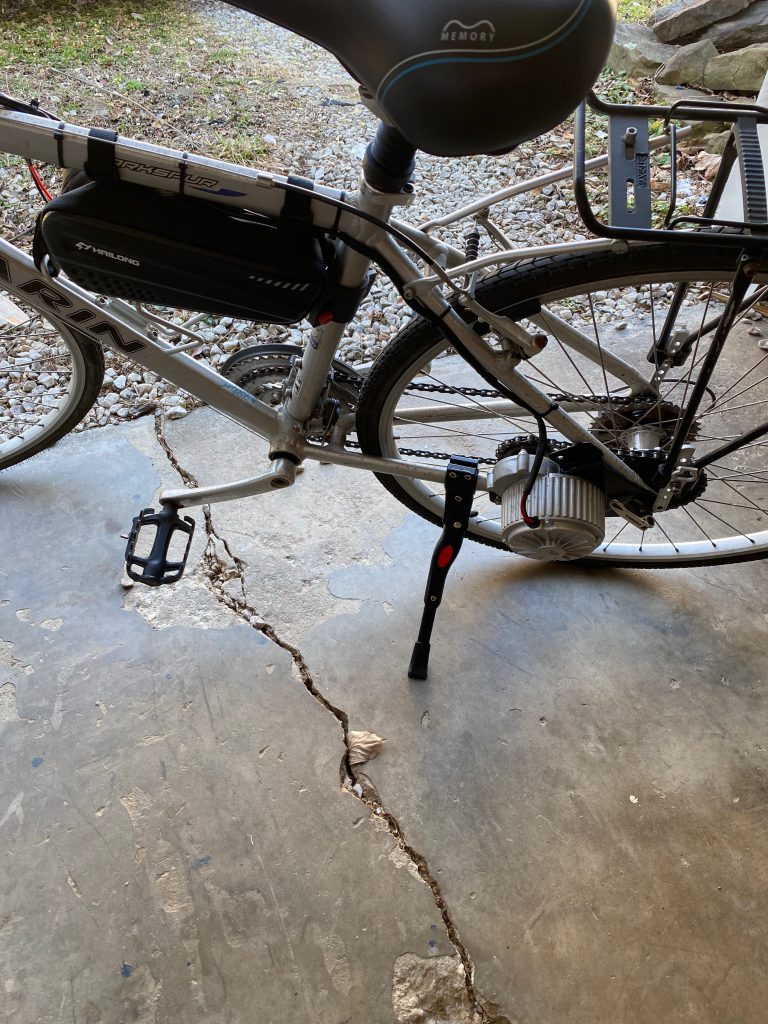
The next step was to mount the drive sprocket and motor assembly. Sadly, I didn’t take many pictures of this part since I was excited and in a bit of a hurry to get out there / try this out. Basically, you install the drive socket to the rear wheel using the rubber mounting system and bolts. One item I recommend using here is thread locker / sealant as you DO NOT want the bolts coming loose!!!! After this, you mount the motor assembly to your frame using the rear hub nut and the two mounting clamps provided by the kit… Or, so I thought!!!

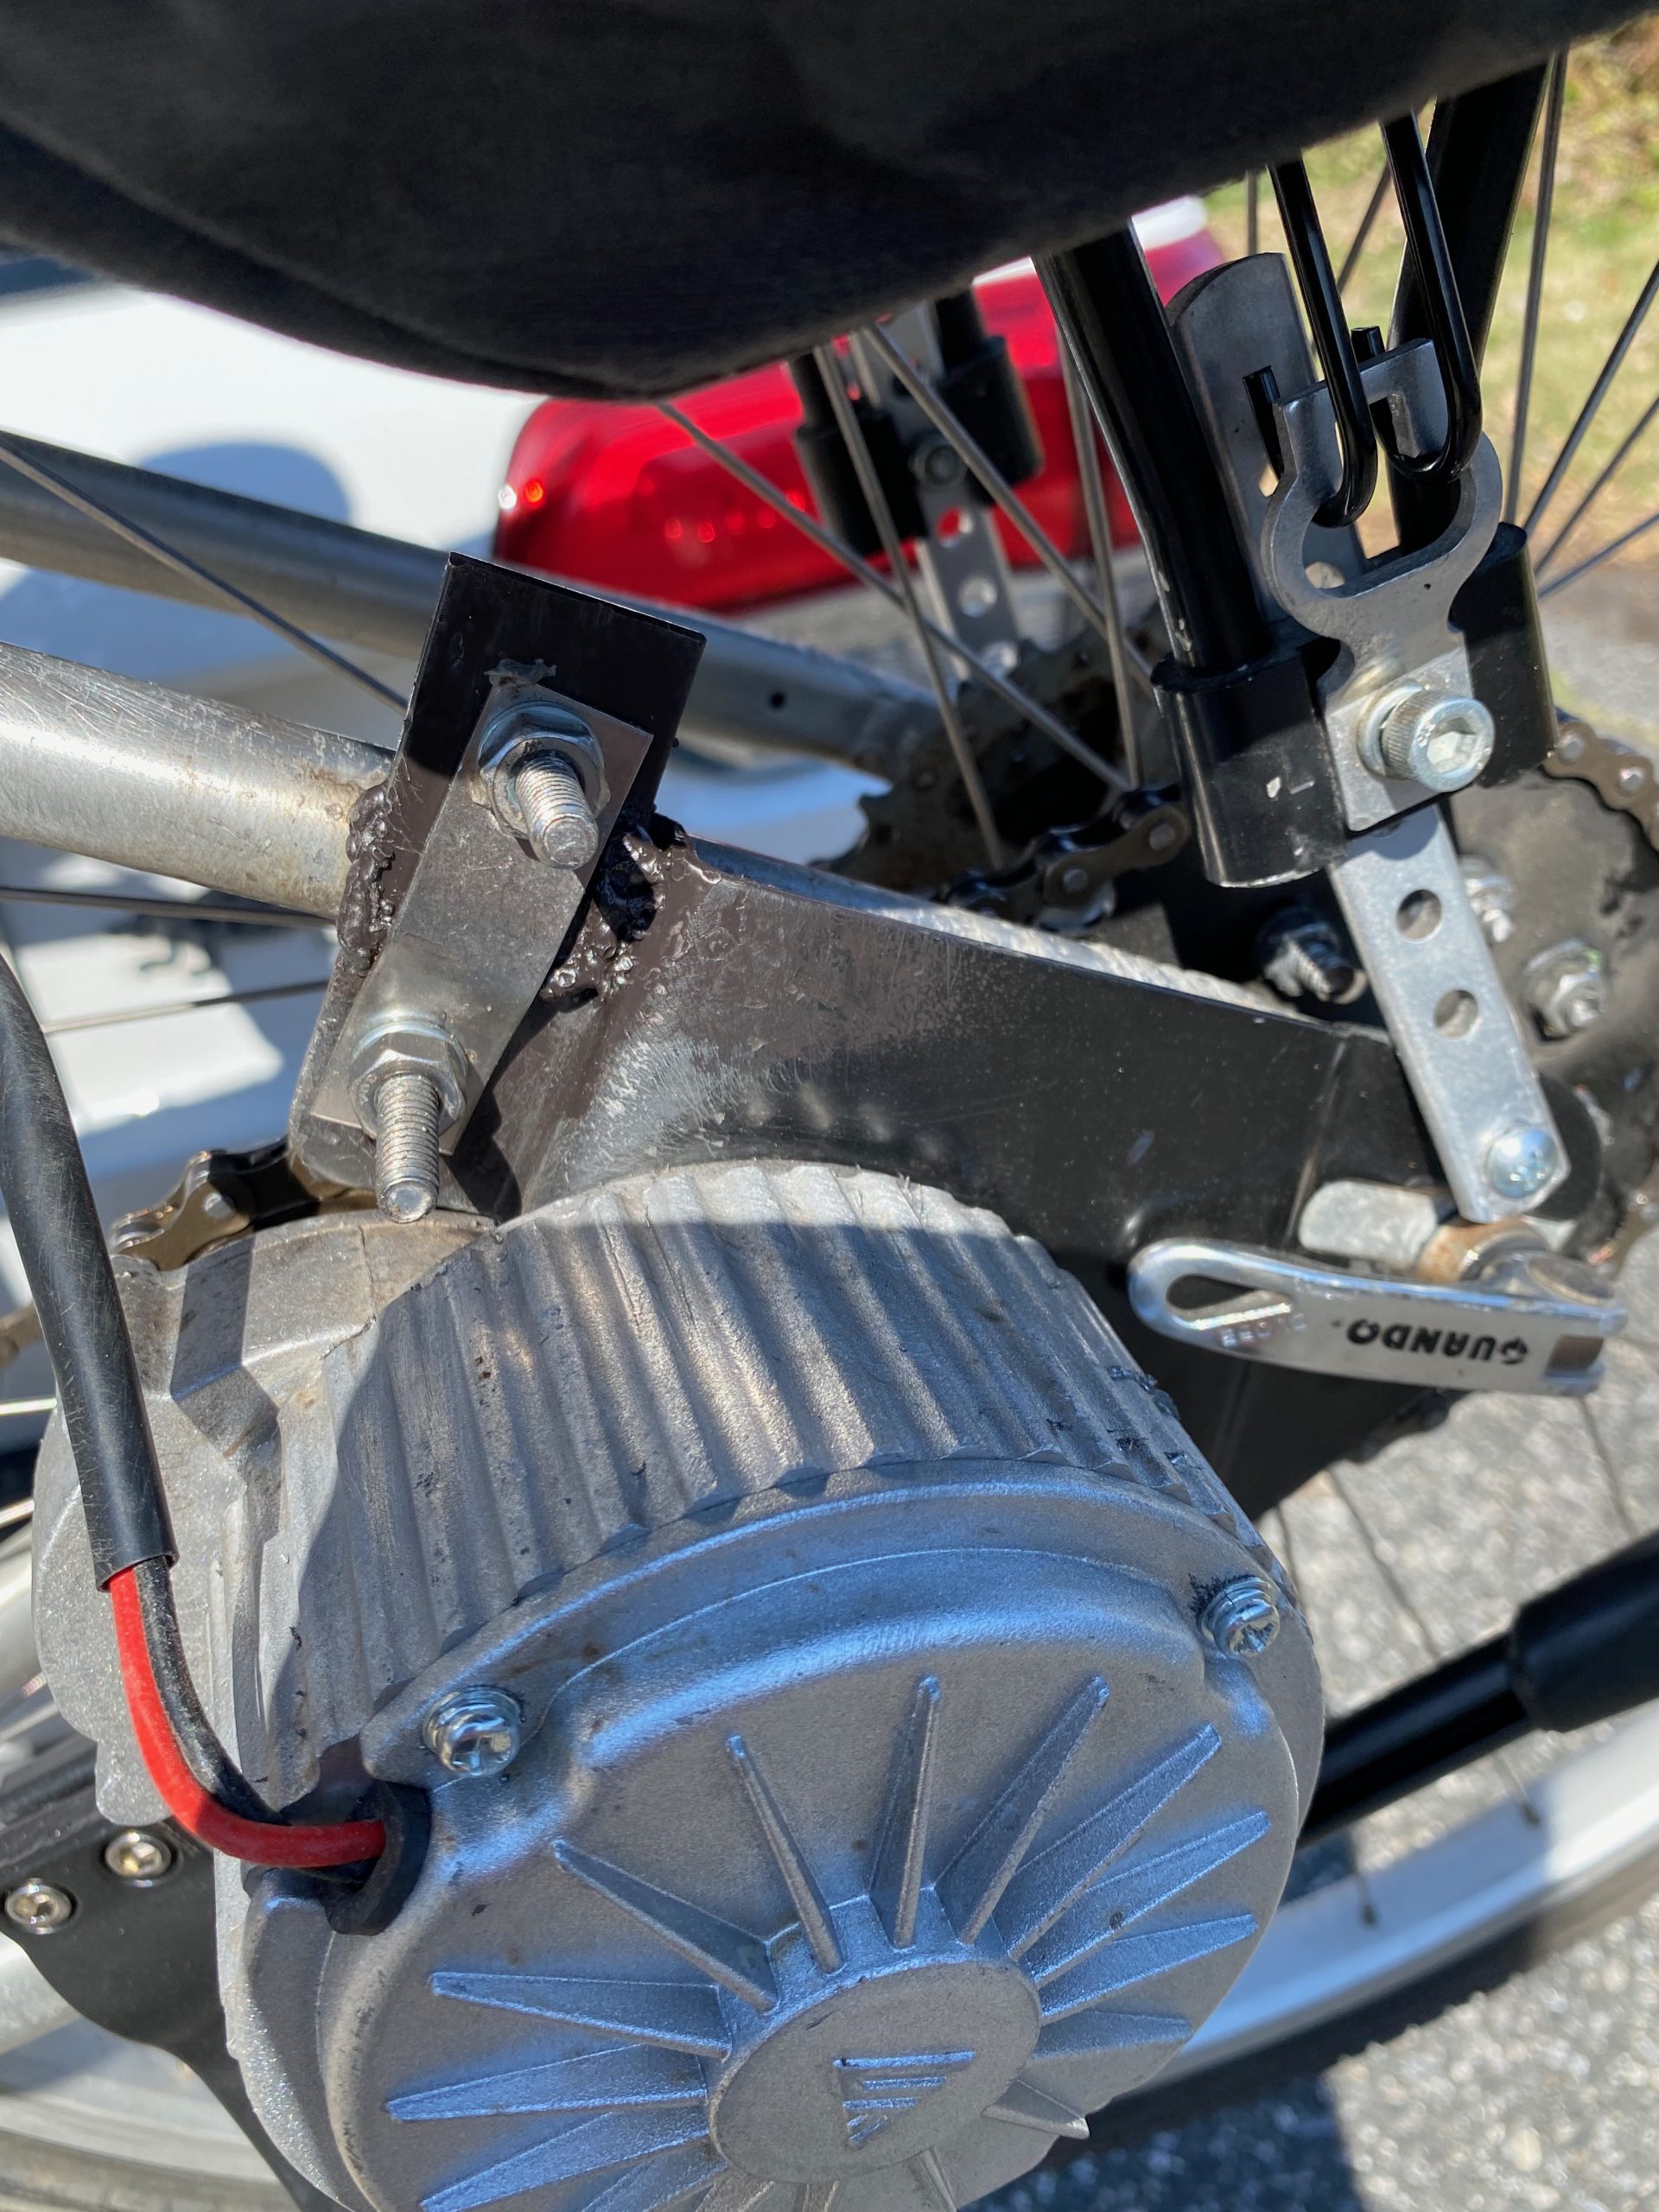
Surprise!!!!! it didn’t exactly fit my bike. If you read the notes on the l-faster page (link here) it says that “you may be required to weld a tab / fabricate a mount for the motor on some bikes.” Sadly, this is exactly what happened to me! Thankfully, I can do some basic welding using FCAW, and I was able to weld on a tab / use a stainless ubolt for the motor mount. Still, this is not something for a beginner to take on! I highly advise that someone either learn basic welding and get a cheap welder, or have some who is capable of welding, available before taking on this project! Also of note here is that I will be adding an adjustable idler pulley / chain tensioner in the next phase as once this motor is mounted as above, I do not forsee myself wanting to move it.

To start off with, I decided to get the cheapest battery I could find that is locally available via Amazon. There are many 36v batteries available on the market today, but many of the higher capacity batteries are all “wait a long time for shipping” due to transport regulations here in the USA. 8AH seems to be the sweet spot for Amazon Prime / next day shipping. I ended up getting this battery (link).

First ride:
With everything installed and connected / battery properly wired in, I turned the key and saw 40v! Okay, its time to try this out… My first ride was pretty straight forward. Just a simple “around the block” with a couple large hills that we have in my neighborhood. On a flat road, this performs beautifully. a twist of the throttle and the bike is soon at around 8-10 mph. It’s not too torquey/not too fast… just right IMHO. On a steep uphill the motor struggled to get more than 5mph. This is where I had to peddle. But, it really wasn’t bad at all! Pedaling uphill with the motor engaged feels just like pedaling on flat ground and it’s easy to attain/maintain 10 mph on a very steep hill. This is exactly the performance that I had hoped for!
The only two small glitches that I had to contend with are maintaining appropriate chain tension and adjusting my bike appropriately. Both of these will be solved shortly with re-fitting / repositioning my riding position, and addition of a chain tensioner.
The first big test outing:
After a couple short city rides on my own, I decided it was time to test this publicly. I attended the first Baltimore Bike Party at the end of March 2022. Video link below. It went reasonably well, and I learned a lot!!!! Most of these lessons will be applied to the phase 2 improvement build. But for a short list, here is what I can offer.
- I really want safety indicators! I.E. functional brake light, headlight, running lights, horn, etc.. etc.. The city is well lit and has decent bike paths… but drivers are crazy!
- 8ah was good enough for about 10-ish miles, but really struggled at the end riding my bike back to my car. Need bigger battery bank for the riding that I want to do and the weight I carry.
- many more nice to haves….
Conclusion (for now):
This project is 100% worth it! I’m well underway with the phase 2 build and some of the improvements that I mention above. But with the fun that I have had and the additional range and speed that this bike affords me, not to mention the additional exercise, its been worth every penny. In the end, sadly, with the improvements that I am making this will not exactly be much cheaper than buying a factory-built ebike, but this is my choice to keep building on top of this basic kit. If all one can afford is < $500 usd, and you find yourself still wanting to get into the world of electric bikes, I highly recommend looking into this kit.